Scorecard

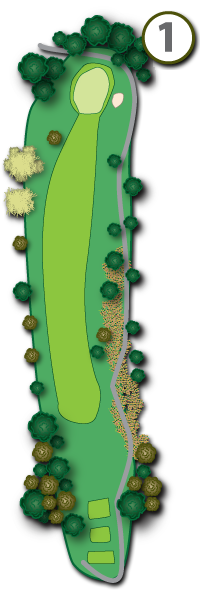
Hole #1
Tips for Hole #1
Par 4 Hcp 12/12 While it may be a relatively short opening hole, the trees on the right-hand side will block any approach to the green should your tee shot land there. A small bunker guards the right side of this very large green.
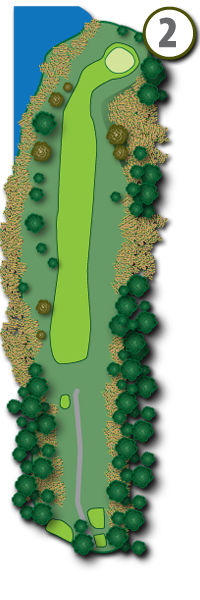
Hole #2
Tips for Hole #2
Par 5 Hcp 2/2 This hole can reward golfers who hit solid tee shots as well as their second shot. The second shot is key to playing this hole. Many golfers choose to ‘go for it’ in two but beware. A large hill stands between the green and the player which can turn many a birdie opportunity into bogey or worse. A large pond awaits errant shots on the left side.
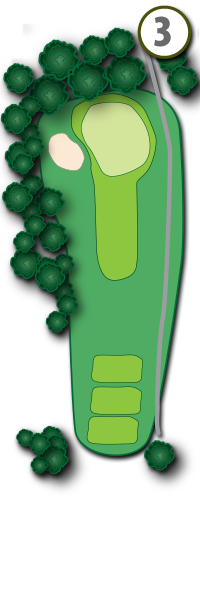
Hole #3
Tips for Hole #3
Par 3 Hcp 16/16 When playing this scenic par 3, golfers should add additional yardage to their club selection as this hole is uphill but disguised as being flat more or less. The large green is two-tiered which adds pressure to the short game!
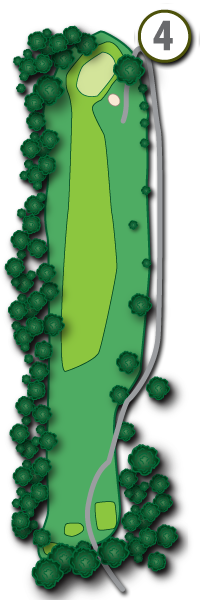
Hole #4
Tips for Hole #4
Par 4 Hcp 4/4 Players will enjoy the view here, where golfers must hit from a high elevated tee to a rather wide fairway below. The second shot offers players to test their skills as it requires shots to carry the green. Anything short will stay short and run the risk of rolling down a slope of about 10 yards. Oh, and by the way, the green is also double-tiered.
Hole #5
Tips for Hole #5
Par 4 Hcp 10/10 Players would be wise to play this short par 4 up the left side where hitting driver might be a bad idea. The large pine trees to the right block any approach shots to the green. The large oak that guards the front right portion of the green has been known to frustrate golfers of all skill levels.

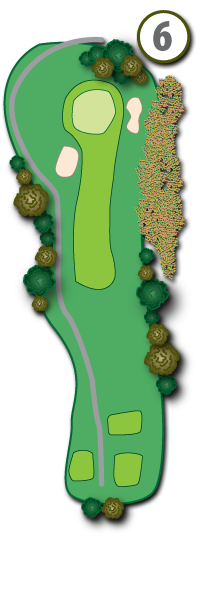
Hole #6
Tips for Hole #6
Par 3 18/18 This challenging par 3 can turn a scorecard upside down pretty quickly. A bunker sits strategically to the right of the green and any shots left will end up down in a treacherous valley where it can seem impossible to get up and down.
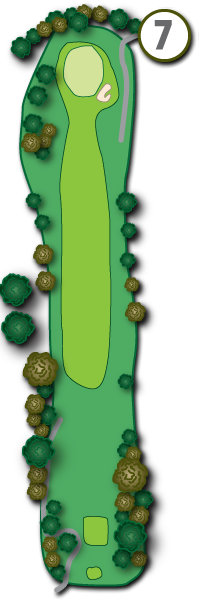
Hole #7
Tips for Hole #7
Par 4 Hcp 14/14 Another high elevation tee shot, players may look to keep the driver in the bag. The fairway is rather narrow with trees on both sides of the hole to prevent golfers from having a clear path to the green.
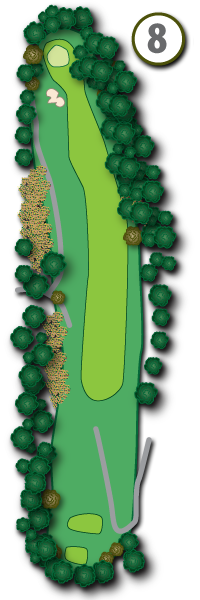
Hole #8
Tips for Hole #8
Par 4 Hcp 6/6 A challenging hole from yet another elevated tee box. Trees guard both sides of the hole. The green is the true defense of this hole though as it offers a two leveled putting surface as well as bunkers on both the front left and ride side to punish errant shots.
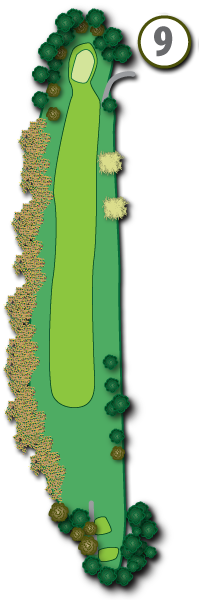
Hole #9
Tips for Hole #9
Par 5 Hcp 8/8 Many golfers consider this to be a breather hole. It can reward those fortunate enough to hit to good shots. However, should you hit any shot left, a stream bed penalizes those who are unfortunate enough to hit it there.
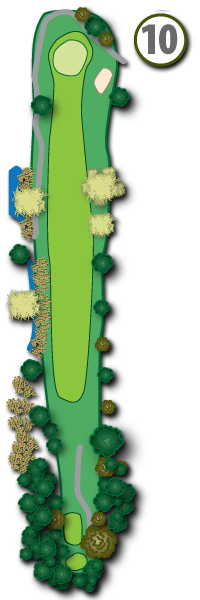
Hole #10
Tips for Hole #10
10 Par 4 Hcp 3/3 A very difficult start to the back nine. In fact Bob Haggerty Jr., the golf professional here from 1967-2004 once dubbed 10, 11 and 12 ‘Amen Corner North’. The hazard on the left and the trees lining the right encourage golfers to keep their tee shots right down the middle.
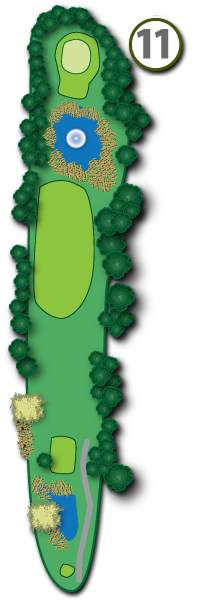
Hole #11
Tips for Hole #11
Par 4 Hcp 9/9 This is a risk/reward hole. A driver selection off the tee will require a player to carry their shot 250 yards roughly to cross the pond that sits in front of the green. Most players choose an iron for their tee shot here.
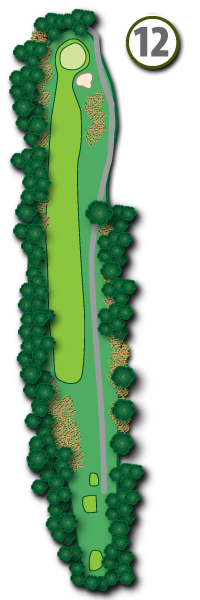
Hole #12
Tips for Hole #12
Par 5 Hcp 7/7 Another difficult tee shot which requires accuracy more than anything else. Out of bounds sits on the left while trees line the right. A very large bunker challenges golfers on their approach shot to the green
Hole #13
Tips for Hole #13
Par 3 Hcp 17/17 While short in distance, this hole requires a solidly hit shot to get it close to the hole. Winds generally gust in the player’s face on breezy days. A bunker guards the right side and will require a skillful shot to get out as the green slopes away from the player.

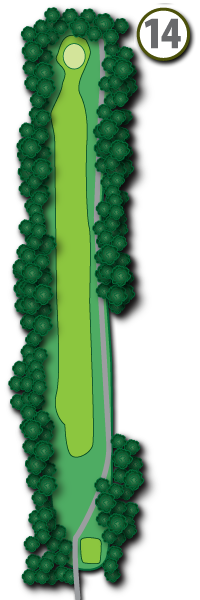
Hole #14
Tips for Hole #14
Par 5 Hcp 1/1 Aptly nicknamed “The Monster”, this hole is the longest on the course and one of the longest in the Capital Region. The fairway flows left to right so play your shots towards the left side of this fairway. The green can be tricky with plenty of undulation changes throughout.
Hole #15
Tips for Hole #15
Par 3 Hcp 13/13 This is the longest par 3 on the course. Hole #15 very rarely surrenders a birdie due to it’s length.

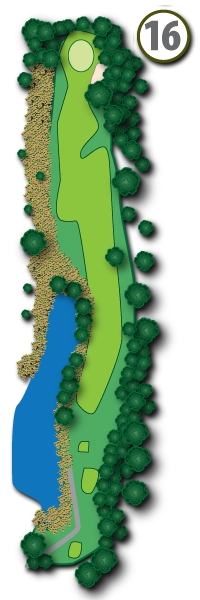
Hole #16
Tips for Hole #16
Par 5 Hcp 5/5 A true test of a tee shot. Many a player in tournament play or enjoying a well-played round to this point have felt the pressure as the water hazard seems to invite golfers to hit their tee shots right into it. Many choose to bail out right to play it safe, however, the trees there can block out the second shot. Hit it straight and you will be rewarded.
Hole #17
Tips for Hole #17
Par 3 Hcp 15/15 The most scenic hole on the course this par 3 has been called. It also is quite challenging with the water hazard sitting directly to the right of the green and a bunker to the left. There have been plenty of hopes dashed on this hole.

Hole #18
Tips for Hole #18
Golfers have an opportunity to score here as the fairway is rather inviting. A good tee shot will leave most players with a short iron to the green which is ideal for a scoring chance.
